
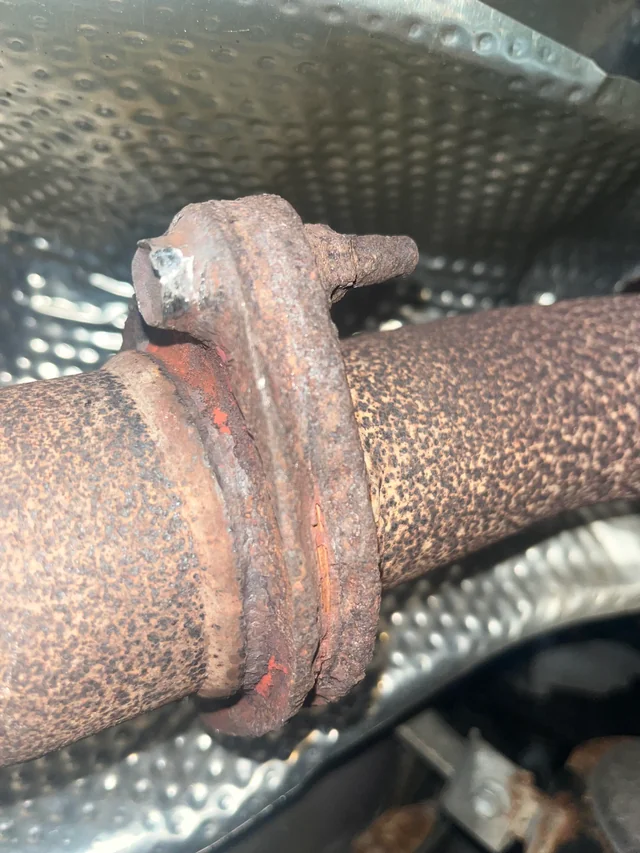
「マフラーのボルトが錆びてボロボロ……ステンレスに変えてしまおうか?」
DIYで車やバイクを整備する人なら、一度はこう考えたことがあるはずです。しかし、メーカーがあえて錆びやすい「鉄」のボルトを採用し続けるのには、コストダウンだけではない明確なエンジニアリング上の理由があります。
今回は、排気系に鉄ボルトが使われる3つの理由と、プロも実践する「焼き付き防止テクニック」、そして「固着したボルトを折らずに外すロードマップ」を徹底解説します。
なぜマフラーには「錆びる鉄ボルト」が使われるのか?
一見、錆びないステンレスの方が優秀に見えますが、排気系のような過酷な環境下では、ステンレスが逆にトラブルの原因になることがあります。
1. 熱膨張による「破断」と「緩み」を防ぐ
金属は熱で膨張しますが、ステンレスは鉄よりも熱膨張率(熱で伸びる割合)が大きいという特性があります。
排気系は走行中に数百度になり、停止すれば常温に戻る激しい熱サイクルを繰り返します。
- マフラー本体(鉄)とボルト(ステンレス)の膨張率が違うと、熱が入った時にボルトだけが伸びすぎたり、逆に締め付けがきつくなりすぎたりします。
- これが原因で、ボルトが勝手に緩んだり、最悪の場合は引っ張られて破断(折れる)してしまいます。
鉄ボルトなら本体と同じように伸縮するため、このリスクを最小限に抑えられます。
2. 最悪のトラブル「かじり(焼き付き)」の回避
ステンレスボルトの最大の弱点が「かじり(Galling)」です。
高温下でステンレスのねじ山同士、あるいは鉄とステンレスが強く摩擦すると、金属同士が溶着して一体化してしまいます。こうなると、いざ整備しようとした時に絶対に回らず、ねじ切れるという絶望的な状況を招きます。
錆びていても、潤滑剤が染み込む余地のある鉄ボルトの方が、整備性としてはまだ「マシ」なのです。
3. マフラー本体を守る「電食」対策
異なる金属が水に濡れて接触すると、片方が激しく腐食する「電食(異種金属接触腐食)」が起きます。
ステンレスボルトを使うと、ボルト自体は錆びませんが、その代償として相手側のマフラーフランジやエンジンのスタッド穴(鉄やアルミ)が激しく腐食します。
交換可能なボルトを犠牲(犠牲防食)にして、高価なマフラー本体やエンジンを守るという意味合いも含まれているのです。
これで解決!最強の焼き付き防止策
「鉄ボルトを使うべき理由はわかった。でも錆び付いて外れなくなるのは困る」
そんなジレンマを解決するのが、適切な素材選びとケミカルです。
1. 「鉄ボルト + 真鍮ナット」の組み合わせ
レストアの定石テクニックです。
ナット側に真鍮(ブラス)や銅メッキされたものを使用します。これらは鉄より柔らかいため、錆びついてもナット側が負けてくれる(=ボルトを折らずに外せる)可能性が高まります。
2. 必須ケミカル「スレッドコンパウンド」
組む時にひと塗りするだけで、数年後の自分が泣かずに済みます。
| 製品名 | 特徴・おすすめ用途 |
|---|---|
| ワコーズ THC (スレッドコンパウンド) | 【ド定番】 銅粉末入り。日本の整備士の必需品。サンバーのマフラーや足回りならこれで十分。チューブタイプが使いやすくておすすめ。 |
| パーマテックス カッパーアンチシーズ | 【高耐熱】 空冷バイクのエキパイスタッドなど、特に熱が厳しい場所に。 |
| パーマテックス ニッケルアンチシーズ | 【最強】 酸や腐食に強いニッケルベース。ターボ周辺など超高温部の最終兵器。 |
固着した「魔のボルト」を外す4ステップ
もし既にボルトが錆びて一体化している場合、いきなりレンチで力を込めると9割折れます。以下の手順で慎重に攻めましょう。
Step 1. 浸透(前夜から仕込む)
5-56ではなく、浸透力の強い「ワコーズ ラスペネ」を使用します。ネジ山の隙間に吹き付け、できれば一晩放置します。
Step 2. 衝撃(サビの結合を壊す)
ボルトの頭をハンマーで「コンッ、コンッ」と叩きます。回す方向ではなく、軸方向(奥へ押し込む方向)に衝撃を与え、内部の錆の結晶に亀裂を入れます。
Step 3. 熱(ここが最重要)
ガストーチで「ナット側(メスネジ側)」を炙ります。
ボルトではなく周りを温めて穴を広げるイメージです。「熱々に炙ってラスペネを吹く(急冷&浸透)」を繰り返すと、オイルが奥まで吸い込まれます。
※ガソリンタンク周辺など火気厳禁の場所ではヒートガンを使いましょう。
Step 4. 「締め」と「緩め」の反復
いきなり緩めようとせず、「一度クッと締める」動きを試してください。少しでも動けば勝ちです。「緩める⇔締める」を小刻みに繰り返しながら、だましだまし回していきます。
車種別ワンポイント注意点
サンバー(特にスーパーチャージャー車)
エキマニの遮熱板ボルトは非常に細く(M6)、熱害をもろに受けているため極めて折れやすいです。無理そうなら、早めにねじ切ってドリルで揉み直す覚悟が必要な場合もあります。
カブ・NSR系エンジン(アルミヘッド)
エンジン側がアルミ、スタッドボルトが鉄の場合、電食で強固に固着していることが多いです。アルミは鉄より柔らかいため、無理に回すとエンジン側のネジ山ごとむしり取ってしまいます。
アルミは熱膨張が大きいので、「しっかり熱を入れてから回す」のが成功の鍵です。
まとめ
- マフラーに鉄ボルトを使うのは、熱膨張・かじり・電食を考慮した理にかなった選択。
- 対策にはスレッドコンパウンドの塗布と、真鍮ナットの流用が有効。
- 外す時は「ラスペネ・打撃・熱」の3点セットで焦らず攻略する。
ボルト一本のトラブルで、楽しいDIYが修羅場に変わることもあります。正しい知識とケミカルで、快適なガレージライフを送りましょう!
“My exhaust bolts are rusted out… Should I replace them with stainless steel?”
If you do your own maintenance on cars or motorcycles, you’ve probably thought about this. However, there are clear engineering reasons beyond cost-cutting why manufacturers continue to use rust-prone “steel” (carbon steel) bolts for exhaust systems.
In this article, we’ll explain the three reasons why steel bolts are used, professional “anti-seize techniques,” and a “roadmap” for removing stuck bolts without breaking them.
Why Are “Rust-Prone Steel Bolts” Used for Exhausts?
At first glance, stainless steel seems superior because it doesn’t rust. However, in harsh environments like exhaust systems, stainless steel can actually cause more trouble.
1. Preventing “Breakage” and “Loosening” Due to Thermal Expansion
Metals expand when heated, but stainless steel has a higher coefficient of thermal expansion (stretches more with heat) than steel.
Exhaust systems go through extreme thermal cycles, reaching hundreds of degrees while driving and returning to ambient temperature when parked.
- If the expansion rates of the muffler body (steel) and the bolt (stainless steel) are different, the bolt may stretch too much when heated or become overtightened.
- This can cause the bolt to loosen on its own or, in the worst case, be pulled apart and fracture (break).
Steel bolts expand and contract at the same rate as the main body, minimizing this risk.
2. Avoiding the Worst Trouble: “Galling”
The biggest weakness of stainless steel bolts is “Galling.”
Under high temperatures, if stainless steel threads rub strongly against each other or against steel, the metals can weld together. If this happens, the bolt will absolutely not turn and will shear off when you try to service it later.
Even if they are rusted, steel bolts that allow penetrant oil to soak in are still “better” from a maintenance perspective.
3. Protecting the Muffler Body from “Galvanic Corrosion”
When different metals touch in the presence of water (electrolyte), one metal corrodes rapidly. This is called “Galvanic Corrosion.”
If you use stainless steel bolts, the bolts won’t rust, but as a trade-off, the opposing muffler flange or engine stud holes (steel or aluminum) will corrode severely.
Steel bolts are partly used as a “sacrificial anode” to corrode instead of the expensive muffler body or engine.
The Solution! The Ultimate Anti-Seize Strategy
“I understand why steel bolts are used, but I don’t want them to seize up.”
The solution to this dilemma is proper material selection and chemicals.
1. The “Steel Bolt + Brass Nut” Combination
This is a standard restoration technique.
Use Brass or Copper-plated nuts. Since these are softer than steel, if they seize, the nut is likely to strip first (meaning you can remove the bolt without breaking it).
2. Essential Chemical: “Anti-Seize Compound”
Just one coat when assembling will save future-you from tears.
| Product Name | Features & Recommended Use |
|---|---|
| WAKO’S THC (Thread Compound) | [Standard] Contains copper powder. A must-have for Japanese mechanics. Sufficient for Sambar exhausts and suspension. The tube type is recommended. |
| Permatex Copper Anti-Seize | [High Heat] Copper-based. Great for air-cooled motorcycle exhaust studs where heat is severe. |
| Permatex Nickel Anti-Seize | [Strongest] Nickel-based, resistant to acid and corrosion. The ultimate weapon for turbo areas and extreme heat. |
4 Steps to Remove Stuck “Demon Bolts”
If a bolt is already rusted solid, applying full force with a wrench will break it 90% of the time. Attack carefully with the following steps.
Step 1. Penetration (Prep the Night Before)
Use a strong penetrant like “WAKO’S Raslpene” (or high-quality penetrating oil like PB Blaster/Kroil), not just standard WD-40. Spray into the thread gaps and leave it overnight if possible.
Step 2. Impact (Break the Rust Bond)
Tap the head of the bolt with a hammer (“Clank, clank”). Apply impact in the axial direction (pushing in), not the turning direction, to crack the rust crystals inside.
Step 3. Heat (Most Important)
Heat the “Nut side (Female thread side)” with a gas torch.
Imagine expanding the hole by heating the surrounding area, not the bolt itself. Repeat “Heat until hot -> Spray Penetrant (Rapid Cooling & Penetration)” to suck the oil deep inside.
*Use a heat gun in areas where fire is strictly prohibited, such as near gas tanks.
Step 4. “Tighten” and “Loosen” Repetition
Don’t try to loosen it all at once. Try to “Tighten it slightly” first. If it moves even a bit, you win. Wiggle it back and forth “Loosen <-> Tighten” to work it out slowly.
Specific Tips by Vehicle Model
Subaru Sambar (Especially Supercharged Models)
The exhaust manifold heat shield bolts are very thin (M6) and brittle due to heat damage. If they feel stuck, be prepared to snap them and drill them out early on.
Cub / NSR Engines (Aluminum Head)
When the engine is aluminum and the stud bolt is steel, they are often strongly seized due to galvanic corrosion. Since aluminum is softer than steel, forcing it will strip the threads right out of the engine block.
Aluminum expands more with heat, so “heating thoroughly before turning” is the key to success.
Summary
- Using steel bolts for exhausts is a logical choice considering thermal expansion, galling, and galvanic corrosion.
- Effective countermeasures include applying Anti-Seize Compound and using Brass Nuts.
- When removing, use the trio of “Penetrant, Impact, and Heat” and don’t rush.
A single broken bolt can turn a fun DIY project into a nightmare. Use the right knowledge and chemicals to enjoy a comfortable garage life!


コメント