
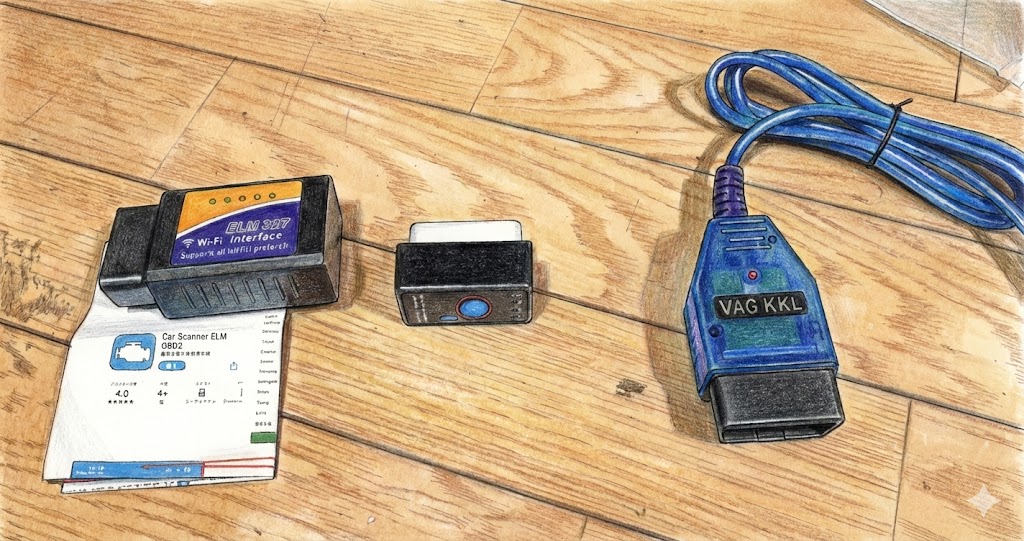
ついに機材が揃いましたね!
ここでは、スバル車(特にサンバーTV/TW系)でOBD2を活用するための「インストール」から「実際の診断手順」までをステップバイステップで解説します。
なお、スバル車は年式や型式によって仕様が異なることが多く、
OBD2対応状況や関連する純正部品を正確に把握することが重要です。
純正部品の品番や適合情報を確認したい場合は、
メーカー公式データを元に検索できるサイトを利用すると安心です。
▶ スバル純正部品を型式から調べる → PartsFan
お手元の機材に合わせて、以下の目次から進んでください。
ルートA:スマホで水温・タコメーター化(ELM327)
まずは、日常の運転を楽しくするスマホ連携のセットアップです。
用意するもの
- ELM327アダプター(必ずバージョン1.5)
- Androidスマホ(アプリ:Torque Pro 推奨)
設定手順
- アダプターを接続
運転席の足元(ヒューズボックス付近)にある台形のコネクタにELM327を挿します。
※LEDが点灯することを確認してください。 - Bluetoothペアリング
スマホのBluetooth設定を開き、「OBDII」というデバイスを探してペアリングします。
(パスコードは通常1234または0000です) - アプリ設定(最重要!)
ここがサンバー特有の鬼門です。アプリ(Torque Pro)を開き、「車両プロフィール」の設定で以下を指定します。 通信プロトコル設定:ISO 14230-4 KWP (fast init, 10.4 kbaud)「自動」では繋がらないことが多いため、この「KWP」に固定するのがコツです。
運用のポイント
接続に成功すると、水温、エンジン回転数、インマニ圧(ブースト圧)などがリアルタイムで動きます。
注意:サンバーのOBD2ポートは常時電源(エンジンOFFでも通電)の場合が多いです。バッテリー上がりを防ぐため、長期間乗らない時はアダプターを抜くか、スイッチ付きを使用してください。
ルートB:PCで深部診断(FreeSSM + VAG-COM)
こちらは「エンジンチェックランプの消去」や「センサーの生データ確認」など、整備士レベルの作業を行うための手順です。
用意するもの
- Windows PC
- VAG-COM 409.1 (KKL) ケーブル
- ソフト:FreeSSM
Step 1: ドライバーのインストール
ケーブルをPCに認識させる、最初にして最大の難関です。
- PCをネットに繋ぎ、ケーブルをUSBポートに挿します。
- Windowsのスタートボタンを右クリックし「デバイスマネージャー」を開きます。
- 「ポート(COMとLPT)」という項目を確認します。
- 成功例:
USB-SERIAL CH340 (COM3)のように表示される。 - 失敗例:「ほかのデバイス」に「!」マークがついている。
→ この場合、ケーブルに使われているチップ(CH340など)のドライバーを手動で検索してインストールしてください。
- 成功例:
- 表示されている「COM番号(例:COM3)」をメモします。
Step 2: FreeSSMの初期設定
- FreeSSMを起動します。
- メニューバーの [Preferences] → [Preferences] をクリック。
- [Interface] タブを選択し、以下の通り設定します。
- Interface type:
VAG-COM Alpha / KKL(またはデフォルト) - Serial Port: さっきメモした
COM番号を選択
- Interface type:
- [Test Diagnostic Interface] ボタンを押し、「Success!」と出れば準備完了です。
Step 3: 実車での運用(診断手順)
接続の順番を守ろう
順番を間違えると通信エラーになりやすいです。
①ケーブルをPCと車に繋ぐ → ②キーをON(エンジン始動) → ③ソフトで接続開始エンジンの診断 メイン画面の [Engine] をクリックします。
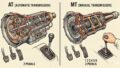
通信が始まると、[Diagnostic Codes](エラーコード確認・消去)や [Measuring Blocks](リアルタイムデータ)が選択できるようになります。 トランスミッションの診断(AT車) メイン画面の [Transmission] をクリックします。
変速ソレノイドの動きや、ATフルードの温度などが見られる場合があります。
まとめ
スバル独自のOBD2は少し癖がありますが、一度環境を作ってしまえば、愛車の健康状態が手に取るようにわかります。
- 普段使いはスマホ(Torque Pro)
- トラブル時はPC(FreeSSM)
この二刀流で、サンバーライフをより長く楽しみましょう!
[Complete Guide] Subaru Proprietary OBD2: Installation & Operation Manual
You have all the gear ready! Now it’s time to take a peek inside your Sambar’s “brain.”
This guide covers everything from Installation to Actual Diagnosis for using OBD2 on Subaru vehicles (specifically the Sambar TV/TW series).
Choose your route from the table of contents below based on the equipment you have prepared.
Route A: Smartphone Monitoring (ELM327)
First, let’s set up the smartphone link to make your daily driving more enjoyable.
Setup Procedure
- Connect the Adapter
Plug the ELM327 into the trapezoidal connector located near the fuse box in the driver’s footwell.
※Make sure the LED lights up. - Bluetooth Pairing
Open your phone’s Bluetooth settings, find the device named “OBDII,” and pair it.
(The passcode is usually1234or0000). - App Configuration (CRITICAL STEP!)
This is the biggest hurdle for the Sambar. Open the app (Torque Pro), go to “Vehicle Profile,” and set the following:Since the “Automatic” setting often fails to connect, manually locking it to this “KWP” setting is the key.Preferred OBD2 Protocol:
ISO 14230-4 KWP (fast init, 10.4 kbaud)
Operation Tips
Once connected, you will see real-time data for Coolant Temperature, RPM, and Manifold Pressure (Boost).
WARNING: The Sambar’s OBD2 port often has “Constant Power” (it stays on even when the engine is off). To prevent battery drain, please unplug the adapter or use one with a switch if you are not driving for a while.
Route B: Deep Diagnostics on PC (FreeSSM + VAG-COM)
This route is for mechanic-level tasks, such as “Clearing Check Engine Lights” or “Monitoring Raw Sensor Data.”
Step 1: Driver Installation
Getting the PC to recognize the cable is the first and hardest part.
- Connect your PC to the internet and plug the cable into a USB port.
- Right-click the Windows Start button and open “Device Manager.”
- Check the “Ports (COM & LPT)” section.
- Success: Displayed as
USB-SERIAL CH340 (COM3)or similar. - Fail: A “!” mark appears under “Other devices.”
→ In this case, you need to manually search for and install the driver for the chip used in your cable (usually “CH340” or “FTDI”).
- Success: Displayed as
- Note down the displayed “COM Number” (e.g., COM3).
Step 2: FreeSSM Initial Setup
- Launch FreeSSM.
- Click [Preferences] → [Preferences] on the menu bar.
- Select the [Interface] tab and configure it as follows:
- Interface type:
VAG-COM Alpha / KKL(or Default) - Serial Port: Select the
COM Numberyou noted earlier.
- Interface type:
- Click the [Test Diagnostic Interface] button. If it says “Success!”, you are ready.
Step 3: Actual Operation (Diagnosis)
- Engine Diagnosis
- Click [Engine] on the main screen.
Once communication starts, you can access [Diagnostic Codes] (Read/Clear Error Codes) and [Measuring Blocks] (Real-time Data). - Transmission Diagnosis (AT Models)
- Click [Transmission] on the main screen.
You may be able to view data such as shift solenoid activity and ATF temperature.
Summary
Subaru’s proprietary OBD2 is a bit quirky, but once you have the environment set up, you can see exactly how healthy your car is.
- For daily driving: Smartphone (Torque Pro)
- For troubleshooting: PC (FreeSSM)
Use this “dual-wielding” approach to enjoy your Sambar life for years to come!

コメント
凄く詳しく記載されていて、スバル愛が伝わってきました(^^♪
コメントありがとうございます!