
これは単なる修理ではありません。錆びて朽ちかけた工具に、新たな命と「黒染め」という渋い魂を吹き込む、男のロマン(DIY)の記録です。
- Cocoon 1: 準備フェーズ【分解と脱脂】
- Cocoon 2: 錆取りフェーズ【お酢漬けの刑】
- Cocoon 3: 黒染めフェーズ【秘伝・紅茶煮込み】
- Cocoon 4: 仕上げフェーズ【刃物油の封印】
- Cocoon 1: Preparation Phase [Disassembly & Degreasing]
- Cocoon 2: Rust Removal Phase [The Vinegar Soak]
- Cocoon 3: Blackening Phase [Secret Black Tea Boil]
- Cocoon 4: Finishing Phase [Sealing with Blade Oil]
Cocoon 1: 準備フェーズ【分解と脱脂】
まずは現状の把握と、下準備です。錆の奥に隠れた「致命的なダメージ」がないかを確認し、お酢のパワーを最大限に引き出すための準備を整えます。
📝 作業手順
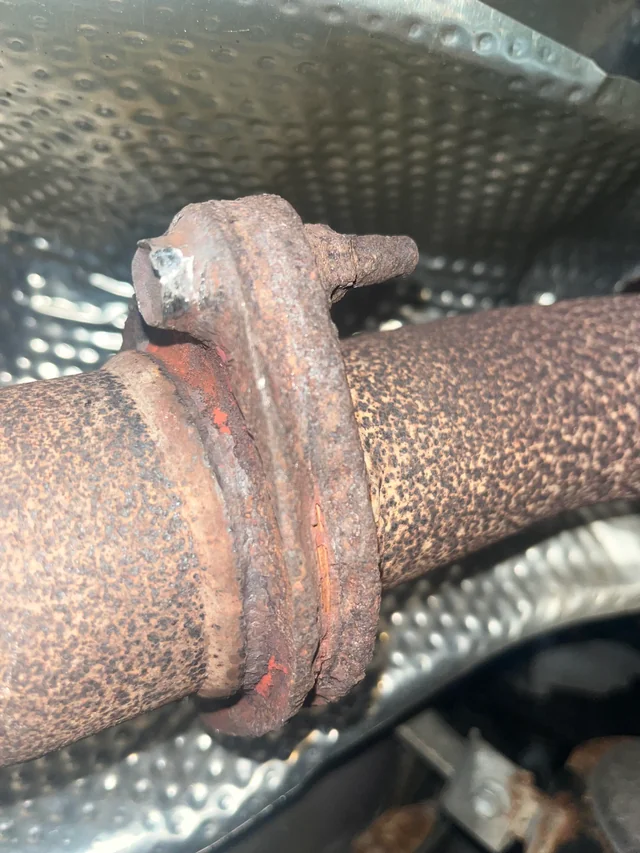
- 安全点検: 爪(アーム)の引っ掛け部分に亀裂やヒビがないか、センターボルトが目視で曲がっていないかを確認します。(※ヒビがある場合は危険なので使用中止!)
- 分解: 浸透潤滑剤(5-56など)を駆使して、すべてのパーツをバラバラに分解します。
- 完全脱脂: パーツクリーナーや台所用中性洗剤で、古い油汚れを徹底的に洗い流します。
- ポイント: ここで油分が残っていると、次のお酢を弾いてしまい、錆が落ちません。
▼ 錆と油にまみれた工具を、まずはバラバラに。

Cocoon 2: 錆取りフェーズ【お酢漬けの刑】
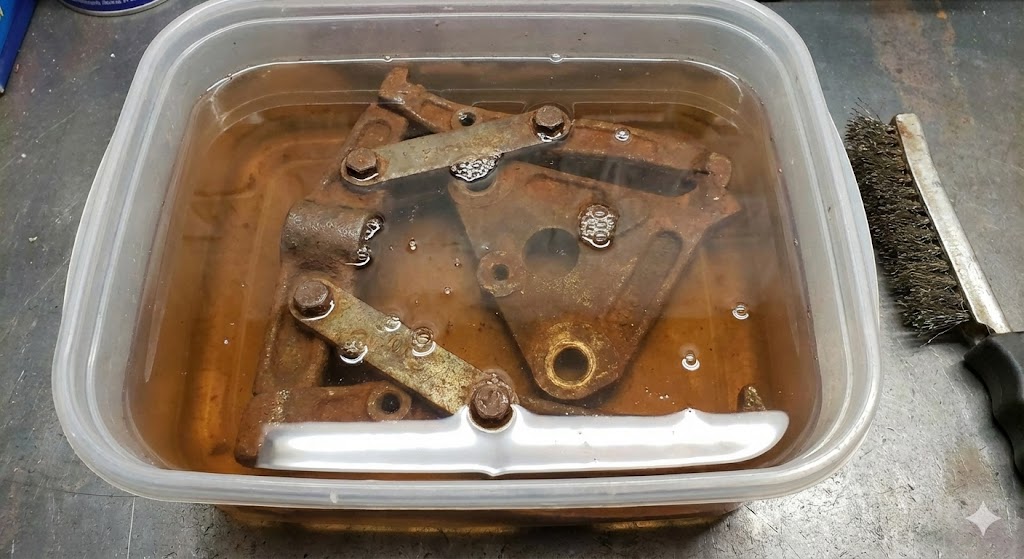
安全で安価な「穀物酢」のパワーで、頑固な赤錆を溶かして落とします。時間はかかりますが、金属を傷めにくい優しい手法です。
📝 作業手順
- 漬け込み: タッパーなどの容器にパーツを入れ、**穀物酢(原液)**をひたひたになるまで注ぎます。
- コツ: 密閉容器を使うと、強烈なお酢の臭いを抑えられます。
- 放置プレイ: そのまま24時間〜3日間放置します。
- ブラッシング: 1日1回様子を見て、浮いてきた錆をワイヤーブラシでゴシゴシ擦り落とします。
- 中和(重要): 錆が落ちたら取り出し、水洗い後、すぐに重曹水(またはマジックリン液)に10分浸けて酸を中和します。
▼ お酢の海に沈み、静かに錆を溶かしていく。

Cocoon 3: 黒染めフェーズ【秘伝・紅茶煮込み】
ここが今回のハイライト。お酢で活性化した鉄肌を、紅茶の「タンニン」と反応させて、黒錆(タンニン鉄)の皮膜を作ります。
📝 作業手順
- 超濃厚紅茶: 安いティーバッグを大量(5〜10袋)に使って、ドス黒い色の濃い紅茶を煮出します。
- 酸性化: 煮立った紅茶に、お酢を大さじ1杯ほど加えます(反応促進剤)。
- グツグツ煮る: 錆を落とした直後のパーツを投入し、弱火で20分〜30分ほど煮込みます。
- 変色を確認: 銀色だった鉄が、ガンメタリック〜黒色に変色したら成功です!
▼ 魔女の鍋のごとく、紅茶で煮込まれ黒く染まる。

Cocoon 4: 仕上げフェーズ【刃物油の封印】
最後は、作り上げた黒錆皮膜に良質な油を染み込ませ、最強の防錆コーティングを施します。
📝 作業手順
- 完全乾燥: 紅茶煮から取り出したら水洗いし、ドライヤー等で熱くなるまで完全に乾燥させます。(※水分厳禁!)
- 油の塗布: アツアツの状態の鉄肌に、ウエスで**刃物油(椿油など)**をたっぷりと塗り込みます。油がグングン染み込んでいくはずです。
- 組付け&完成: 余分な油を拭き取り、可動部がスムーズに動くことを確認しながら組み上げます。
▼ 黒光りする渋い艶。これがDIYレストアの到達点。

💪 まとめ
お酢の酸っぱい臭い、紅茶の香り、そして最後に訪れる刃物油の静かな艶。 手間ひまかけた分だけ、新品よりも愛着の湧く、世界に一つだけのプーラーが完成することでしょう。
さあ、まずはスーパーでお酢と紅茶の買い出しからスタートです!DIY魂を燃やして、頑張ってください!
🛠️ 3-Jaw Bearing Puller Restoration Roadmap [Complete Edition]
This is more than just a repair. It is a record of a man’s romance (DIY)—breathing new life and a “blackened” soul into a tool that was rusting away.
Cocoon 1: Preparation Phase [Disassembly & Degreasing]
First, assess the situation and prepare. Check for any “fatal damage” hidden beneath the rust and prepare the surface to maximize the power of the vinegar.
📝 Procedure
- Safety Check: Check the claws (arms) for cracks and ensure the center bolt is not visibly bent. (Note: If there are cracks, discard immediately as it is dangerous.)
- Disassembly: Use penetrating oil (like WD-40 or KURE 5-56) to take apart every single piece.
- Complete Degreasing: Thoroughly wash off old grease and oil using parts cleaner or dish soap.
- Key Point: If any oil remains, it will repel the vinegar in the next step, and the rust will not come off.
▼ Disassemble the tool covered in rust and grease. (Refer to Image 1 above)
Cocoon 2: Rust Removal Phase [The Vinegar Soak]
Using the power of safe and cheap “Grain Vinegar,” we will dissolve the stubborn red rust. It takes time, but it is a gentle method that doesn’t damage the metal.
📝 Procedure
- The Soak: Place the parts in a container (like a Tupperware) and pour undiluted Grain Vinegar until the parts are fully submerged.
- Tip: Use a sealed container to contain the strong smell of vinegar.
- Wait: Let it sit for 24 hours to 3 days.
- Brushing: Check it once a day and scrub off the floating rust with a wire brush.
- Neutralization (Critical): Once the rust is gone, remove the parts, rinse with water, and immediately soak in Baking Soda water (alkaline) for 10 minutes to neutralize the acid.
▼ Sinking into the sea of vinegar, quietly dissolving the rust. (Refer to Image 2 above)
Cocoon 3: Blackening Phase [Secret Black Tea Boil]
This is the highlight. We will react the iron surface (activated by the vinegar) with “tannins” found in tea to create a black rust (Iron Tannate) coating.
📝 Procedure
- Super Strong Tea: Use a large amount of cheap tea bags (5-10 bags) to brew a very dark, concentrated tea.
- Acidification: Add about 1 tablespoon of vinegar to the boiling tea (this acts as a catalyst).
- Simmer: Put the rust-free parts into the pot and simmer on low heat for 20 to 30 minutes.
- Check Color: If the silver iron turns into a Gunmetal or Black color, it’s a success!
▼ Like a witch’s cauldron, boiling in tea to dye it black. (Refer to Image 3 above)
Cocoon 4: Finishing Phase [Sealing with Blade Oil]
Finally, we soak the created black rust layer with high-quality oil to create the ultimate rust-proof coating.
📝 Procedure
- Complete Drying: Remove from the tea, rinse with water, and dry completely with a hair dryer until the metal is hot. (Moisture is the enemy!)
- Oil Application: While the iron is still hot, apply a generous amount of Blade Oil (Camellia oil, etc.) using a cloth. The oil should soak deep into the pores of the metal.
- Assembly & Completion: Wipe off excess oil, check that the moving parts work smoothly, and reassemble.
▼ A deep, dark shine. The pinnacle of DIY restoration. (Refer to Image 4 above)
💪 Summary
The sour smell of vinegar, the aroma of tea, and finally, the quiet luster of blade oil. By taking the time and effort, you will complete a one-of-a-kind puller that you will love more than a brand-new one.
Now, start by buying vinegar and tea at the supermarket! Ignite your DIY spirit and good luck!

コメント