
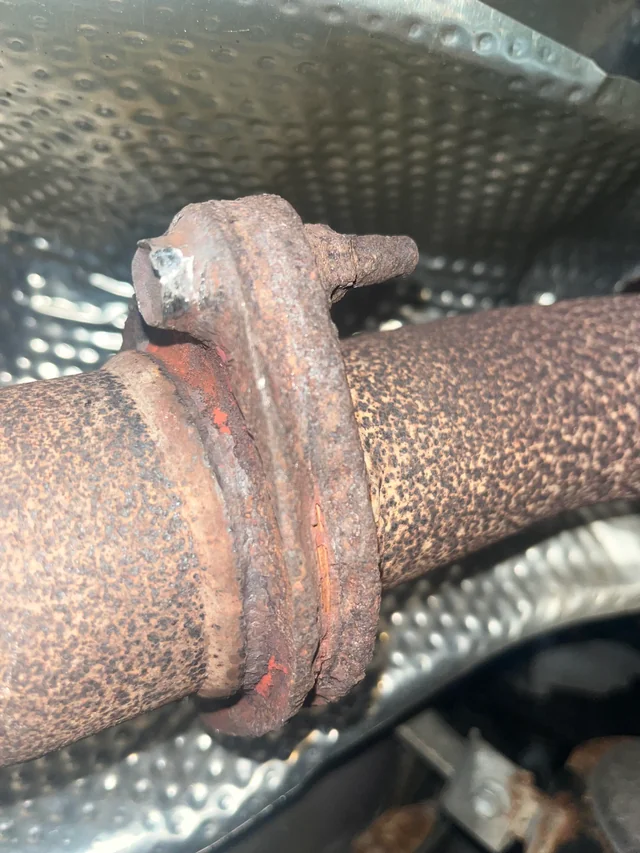
マフラー(排気系)のボルトやナットは、高熱と雨水による「サビ固着」が車の中で最も激しい部分です。
「硬くて回らない…」と無理に力をかけると、ボルトがねじ切れてしまい、修復が地獄のような作業になってしまいます。
今回は、成功率を高めるための**「固着したネジを外すベスト3」と、「頭が舐めてしまった場合の対処法」、さらに最強の秘密兵器「IHヒーター」**について解説します。
固着したネジを外すやり方ベスト3
まずは、ボルトの頭が生きている(工具がかかる)場合の、効果が高い順ランキングです。
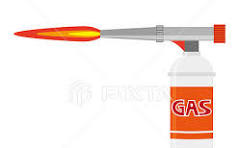
第1位:熱膨張(ガスバーナーで炙る)
マフラーの固着において、最も強力で確実な方法です。 金属は熱すると膨張します。ナット(外側)を急速に加熱して膨張させ、ボルト(内側)との間にわずかな隙間を作り、サビの結合を焼き切ります。
- カセットガスバーナーなどで、ナットの側面を重点的に真っ赤になるくらいまで炙ります(1〜2分程度)。
- 十分に熱したら、火を止め、熱いうちに工具をかけて回します。
注意 燃料タンクやブレーキホース、ゴム部品が近くにある場合は、引火のリスクがあります。濡れタオルで養生するなど十分注意してください。
第2位:浸透潤滑剤 + 待機時間
ただのスプレーではなく、サビの隙間に入り込む高性能な浸透潤滑剤を使います。 一般的な潤滑剤でも良いですが、マフラーの固着には**「ワコーズ ラスペネ」や「KURE 凍結浸透ルブ」**(冷やして収縮させて隙間を作るタイプ)が圧倒的に有利です。
成功のコツ:すぐに回さない! 潤滑剤をたっぷり吹き付けたら、最低でも10分〜数時間放置しましょう。一晩置くとさらに効果的です。回す直前にもう一度吹き付けてからトライします。

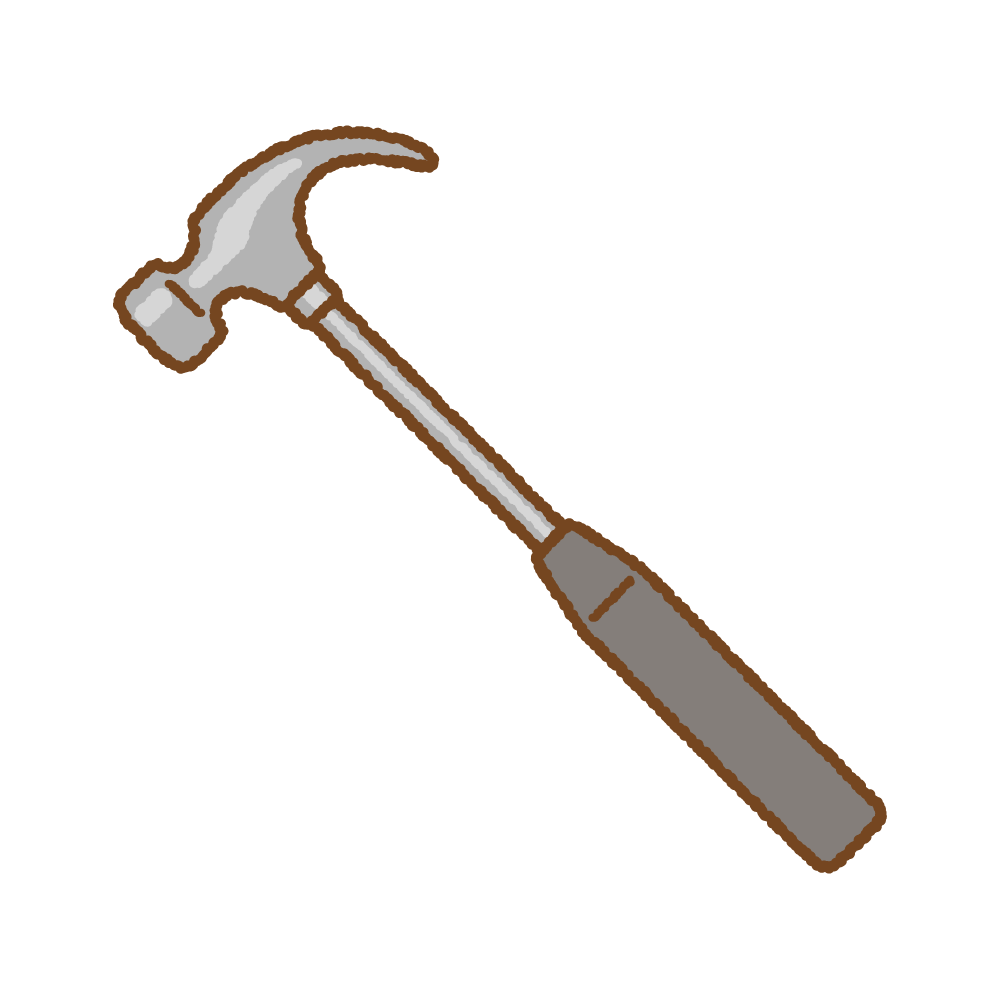
第3位:衝撃(ハンマー・打撃)
サビは硬いですが「脆い(もろい)」性質があります。衝撃を与えることで、ネジ山内部のサビの結晶を砕き、回るきっかけを作ります。
- ボルトの頭(またはナット)をハンマーで「コンコン」と強めに叩きます。
- メガネレンチをかけた状態で、レンチの端をハンマーや手で「ガンッ!」と瞬間的な衝撃(インパクト)を与えて回します。
プロ推奨の「合わせ技」手順
これらは単体ではなく、組み合わせることで最強の効果を発揮します。
- 潤滑剤を吹いてしばらく放置する。
- ハンマーで叩いて衝撃を与え、液剤をさらに奥へ浸透させる。
- バーナーで炙って熱膨張させる(潤滑剤が焼ける煙に注意)。
- 6角ソケット(12角は舐めやすいのでNG)と長いスピンナーハンドルを使い、一気に緩める。
重要な感覚 「ヌルっ」という嫌な感触(ボルトが伸びる感覚)がしたら、すぐに力を緩めてください。そのまま回すと折れます。「締める方向」に少し回してから、再度「緩める」を繰り返すと外れることがあります。
【番外編】最強のツール「電磁誘導加熱ヒーター」
「火を使いたくない」「もっと確実に外したい」という方には、**電磁誘導加熱ヒーター(IHボルトヒーター / ミニダクター)**という選択肢があります。
IHクッキングヒーターと同じ原理で、コイルの中にある金属のボルトだけを数秒で真っ赤に加熱する工具です。
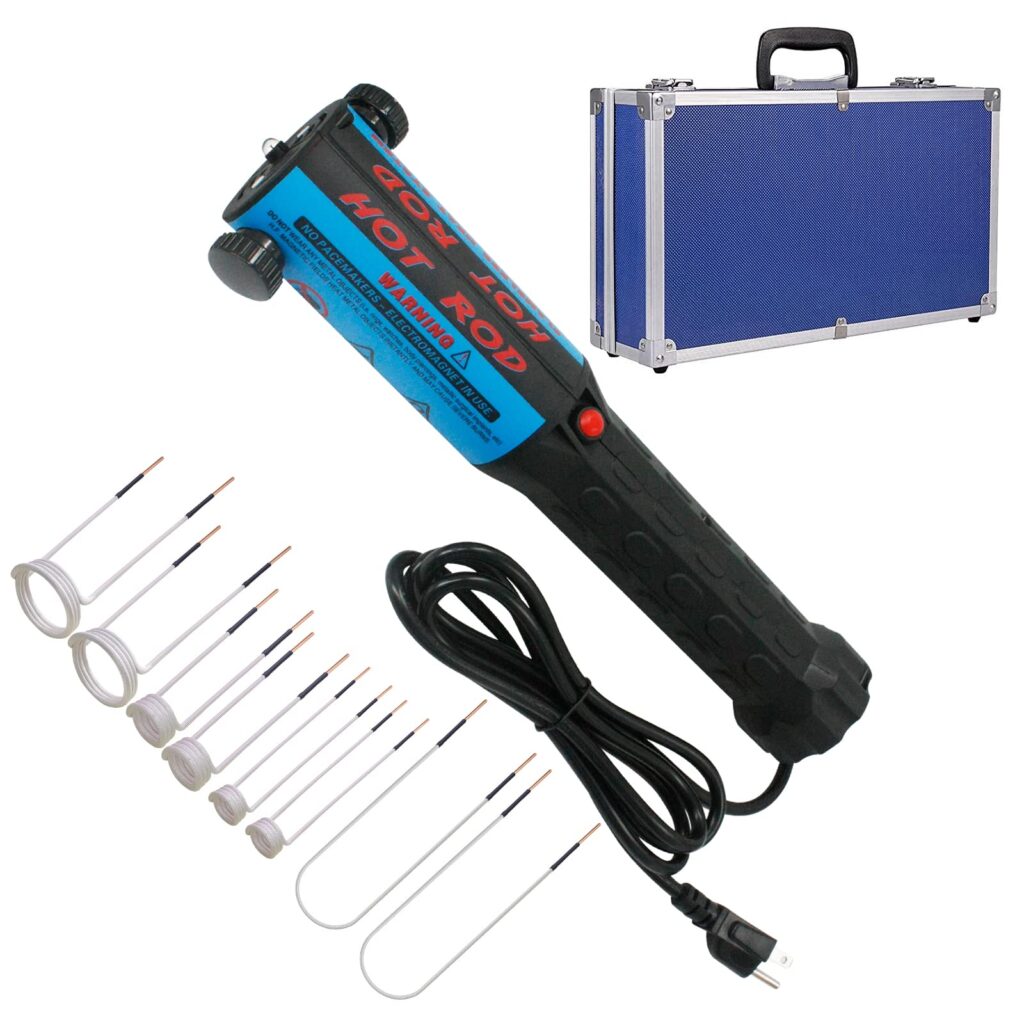
ガスバーナーとの違い
- 安全性が高い: 火が出ないので、周りの樹脂パーツや燃料タンクを溶かす心配がありません。
- 作業が早い: 10秒〜20秒でボルトが真っ赤になります。
- ピンポイント加熱: ナットだけを加熱して膨張させられるため、固着を剥がす効率が非常に良いです。
価格は高価(数万円〜)ですが、頻繁に整備をするなら、ガスバーナーよりも圧倒的におすすめの「切り札」です。
ボルトの頭が丸くなった(舐めた)場合のベスト3
もしサビでボルトが痩せていたり、工具が滑って頭が丸くなってしまった場合のリカバリー方法です。
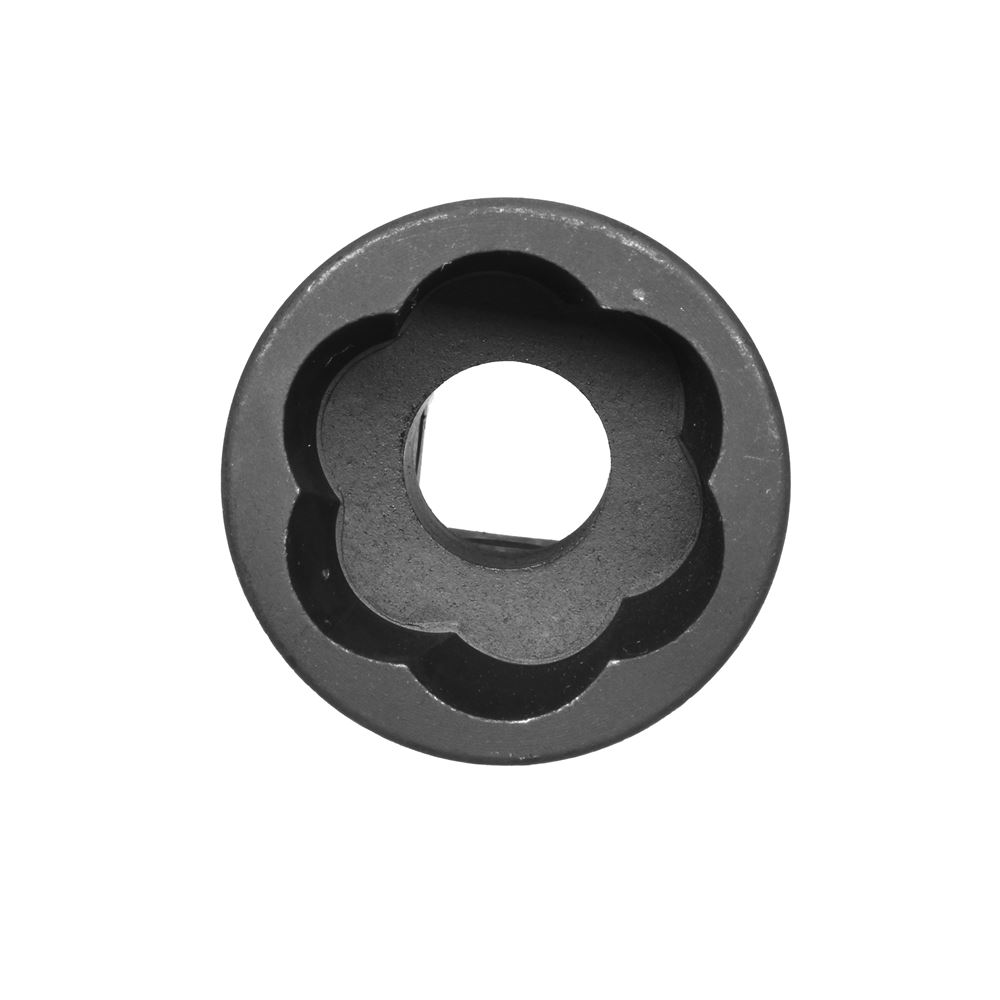
第1位:ツイストソケット(ナットツイスター)
これが最も確実で、成功率が高いです。 ソケットの内側が「らせん状の刃」になっており、緩める方向に回せば回すほど、丸くなったボルトの頭に食い込んでいく特殊工具です。
- やり方: ハンマーで叩き込んで食い込ませ、ラチェットで一気に回します。
- 注意: 一度使うとボルトは再利用不可能です。
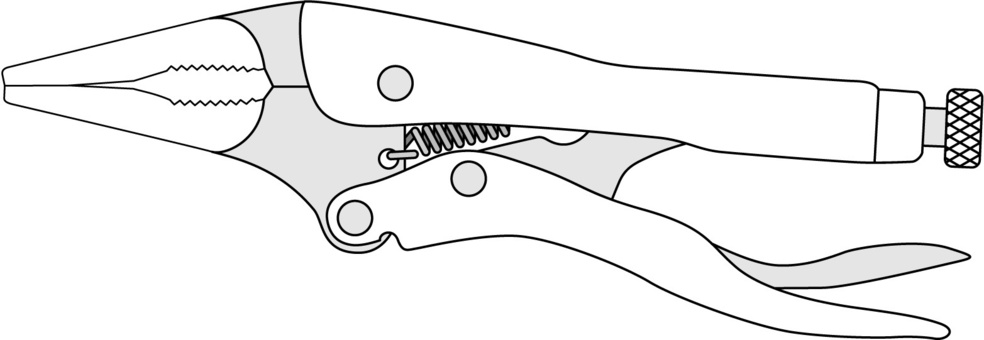
第2位:ロッキングプライヤー(バイスグリップ)
握った状態で**「ロック(固定)」**できるペンチです。
- やり方: 調整ネジを締め込み、「両手を使わないとロックできない」くらいキツキツに設定してボルトを挟みます。プライヤーごとハンマーで叩いて回します。
- コツ: 中途半端な力だと滑ります。「親の仇」くらいの力でロックするのがコツです。
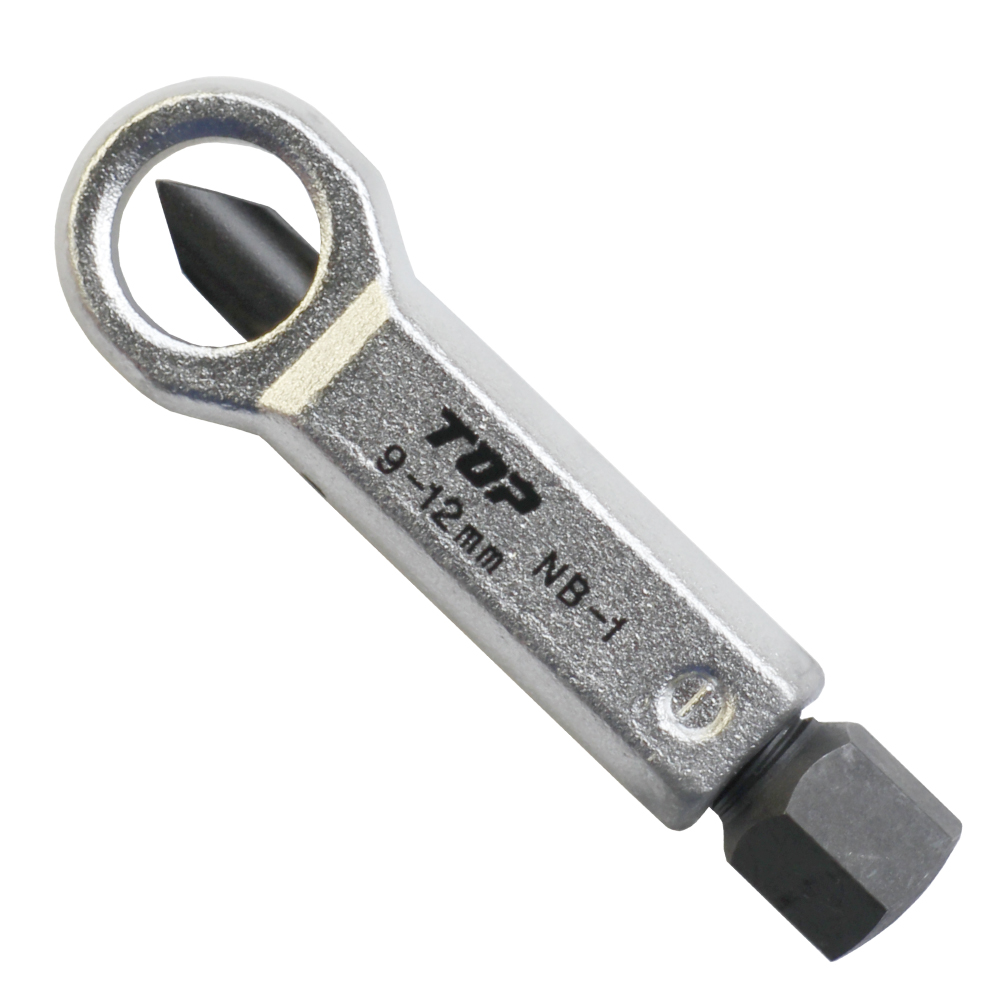
第3位:物理的に加工する
- 頭を削る: サンダーやヤスリでボルトの頭を平らに削り、モンキーレンチがかかる足がかりを作ります。
- ナットを割る: 「ナットブレーカー」という工具で、ナットだけを割って取り外します。
まとめ
マフラーのネジ固着は、力任せにやると必ず失敗します。
- 潤滑剤を吹いて待つ
- 叩いて衝撃を与える
- 熱を加えて膨張させる(バーナー or IH)
- 舐めたらツイストソケット
この手順を守って、焦らず作業を進めてください。
安全第一で、どうしても無理ならプロ(整備工場)に頼むのも勇気ですよ!
[Ultimate Guide] How to Remove Stuck Exhaust Bolts! Top 3 Professional Tricks & Solutions
Exhaust system bolts and nuts are the most prone to “rust seizure” in a car due to high heat and rainwater exposure.
If you try to force them loose with raw power, the bolts will snap, turning a simple job into a nightmare repair.
In this guide, we will introduce the “Top 3 Methods to Remove Stuck Bolts” to maximize your success rate, “How to deal with Rounded-off Heads,” and the ultimate secret weapon, the “Induction Heater.”
Top 3 Methods to Remove Stuck Bolts
Here are the most effective methods when the bolt head is still intact (tools can still grip it), ranked by effectiveness.
#1: Thermal Expansion (Gas Torch)
This is the most powerful and reliable method for exhaust systems. Metal expands when heated. By rapidly heating the nut (outer part) to expand it, you create a microscopic gap between it and the bolt (inner part), breaking the rust seal.
- Use a gas torch to heat the side of the nut until it glows red hot (about 1-2 minutes).
- Once sufficiently heated, turn off the flame and turn the bolt with your tool while it is still hot.
WARNING If the fuel tank, brake lines, or rubber parts are nearby, there is a risk of fire. Please take extreme caution and protect surrounding areas with wet towels.
#2: Penetrating Oil + Waiting Time
Don’t just use regular spray; use a high-performance penetrating oil designed to seep into rust gaps. While standard lubricants are okay, for exhaust bolts, products like “WAKO’S Raspene”, “KURE Freezing Penetrating Lube”, or “PB Blaster” (common overseas) are overwhelmingly superior.
Key to Success: Don’t Turn Immediately! After spraying generously, leave it for at least 10 minutes to several hours. Leaving it overnight is even more effective. Spray one more time right before trying to turn it.
#3: Impact (Hammering)
Rust is hard but “brittle.” By applying shock, you can shatter the rust crystals inside the threads, creating a trigger for the bolt to turn.
- Tap the bolt head (or nut) firmly with a hammer multiple times.
- With a box-end wrench on the bolt, hit the end of the wrench with a hammer or your hand to apply a sudden “shock” (impact) to loosen it.
The “Combo” Technique Recommended by Pros
Pros don’t just use one method; they combine them for maximum effect.
- Spray Penetrating Oil and let it sit.
- Hit with a Hammer to apply shock and help the oil seep deeper.
- Heat with a Torch to expand the metal (watch out for smoke from the burning oil).
- Use a 6-point Socket (12-point sockets slip easily) and a long Breaker Bar to loosen it in one go.
Crucial Sensation If you feel a “mushy” sensation (the feeling of the bolt stretching), stop applying force immediately. It will snap if you continue. Try tightening it slightly, then loosening it again. Repeat this back-and-forth motion.
[Bonus] The Ultimate Tool: “Induction Heater”
For those who want to avoid open flames or want a guaranteed removal, the Induction Heater (Mini-Ductor) is the answer.
Using the same principle as an IH cooking heater, it heats only the metal bolt inside the coil to red-hot temperatures in seconds.
Difference from Gas Torches
- High Safety: No open flame, so there is no risk of melting surrounding plastic parts or the fuel tank.
- Fast: Heats bolts red hot in 10-20 seconds.
- Pin-point Heating: It heats only the nut to expand it, making it extremely efficient at breaking rust bonds.
It is expensive, but if you do maintenance frequently, it is an overwhelmingly better “Ace up your sleeve” than a gas torch.
Top 3 Ways to Remove Rounded (Stripped) Bolts
Here is how to recover if the bolt head has rusted away or your tool slipped and rounded off the corners.
#1: Twist Socket (Bolt Extractor)
This is the most certain method with the highest success rate. The socket has spiral flutes inside. The more you turn in the loosening direction, the harder it bites into the rounded bolt head.
- How to: Hammer it onto the bolt head to make it bite, then turn with a ratchet.
- Note: The bolt cannot be reused after this (replacement is mandatory).
#2: Locking Pliers (Vise-Grips)
These are pliers that can be “Locked” while gripping.
- How to: Tighten the adjustment screw until it’s so tight you need two hands to lock it. Clamp onto the bolt head. Hit the pliers with a hammer to turn.
- Tip: If the grip is halfway tight, it will slip. Lock it with “vengeful force.”
#3: Physical Modification
- Grind the Head: Use a grinder or file to flatten two sides of the bolt head, creating a surface for a monkey wrench to grip.
- Split the Nut: Use a “Nut Splitter” tool to crack the nut open and remove it without damaging the stud bolt.
Summary
Removing stuck exhaust bolts requires patience, not brute force.
- Spray Lubricant and WAIT.
- Hit with a Hammer.
- Apply Heat (Torch or IH).
- Use a Twist Socket if it rounds off.
Follow these steps and take your time.
Safety first! If it seems impossible, asking a pro (mechanic) is also a brave choice!

コメント